Simple hygienic jarring of honey for a small-scale beekeeper
This is the second blog in a series of three, which together aim to show a simple and hygienic method of honey processing for a small-scale beekeeper. The focus of this blog is the filling of jars with honey. It will start with filtered honey in buckets and finish with the filled and labelled jars.
Click here to go back to the first blog on extraction in the honey processing series, if you missed it.
How do I clean and sterilise the jars ready for filling?
Once the honey has settled, it is ready to put into jars. The first stage is to clean and sterilise the jars and lids. Some suppliers can deliver pre-packed jars and lids, which are ready to fill but if the jars or lids have not been in air tight packaging then they will need to be cleaned and sterilised. This year, I bought 8oz and 1lb jars from the bottle company, through Amazon.
The jars are cleaned by putting them upside down in the dishwasher and putting them through a complete wash cycle and then sterilised by putting them in an oven, preheated to 140-degree C, which is then switched off to cool down to a handleable temperature. The lids are washed in hot soapy water, rinsed and allowed to air dry.
How do I set up the honey filling workspace?
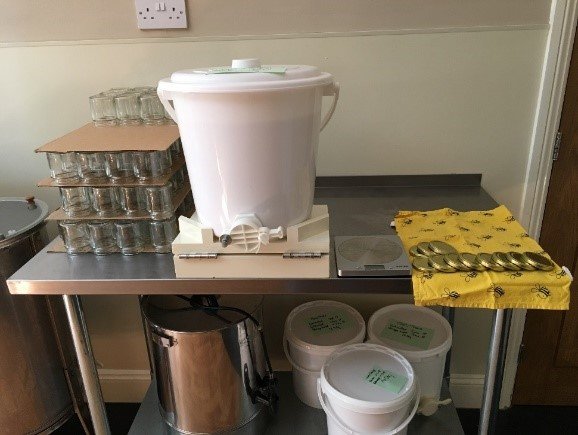
Here is the bench set up for a round of jar filling. From left to right: –
- Cleaned & Sterilised jars – Notice that the jars are stacked open end down, to prevent anything falling into them while they are waiting to be filled.
- The settling bucket on a homemade tilting platform – The tank has a honey tap/valve. The tilting platform is made from plywood, strip wood and two stainless steel hinges. Its painted with a few coats of gloss to make it easy to clean.
- Small domestic digital scales – more on them later.
- Cleaned Lids – again open end down.
- Drip tray – on the floor below the tap is a strategically placed freezer food box.
How do I go about filling the jars?
The filling part of honey processing is straightforward. A jar is filled, weighed and a lid is immediately put on it. The skill with filling is to close the honey valve just at the right time, to get the correct weight first time, to avoid getting any bubbles in the honey, particularly at the neck, and to get all the honey inside the jar!
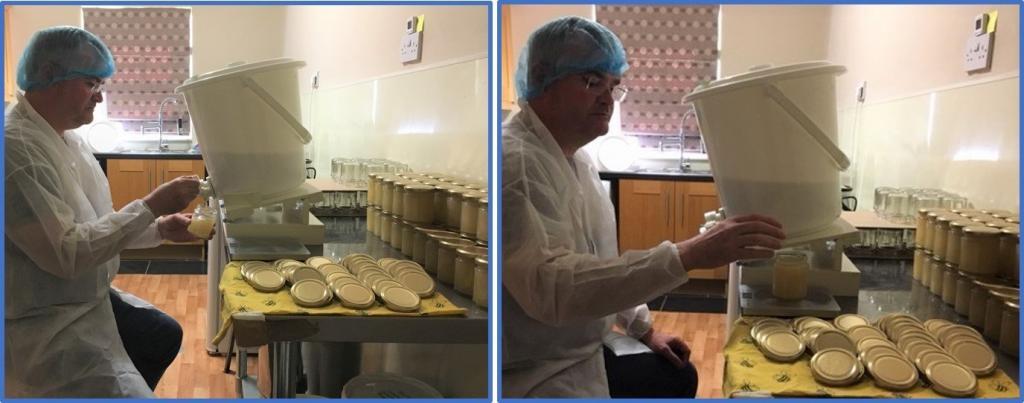
The homemade tilting platform is useful when the bucket is getting low and prevents honey from the surface producing streaks in the jar, until the last jar or two, which are kept for home use.
How do I get the weights right?
There is legislation for the weight of honey that goes into jars for sale. The Weights & Measures Act 1985. The small-scale beekeeper can simplify things a great deal for themselves.
“Average” weight legislation is complex but working with “minimum” weight is easy. Just make sure every jar has at least the “declared” weight of honey in it!
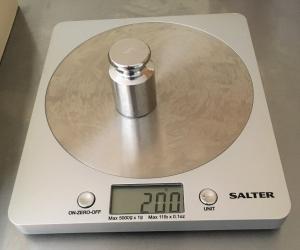
To do this I bought a 200g and a 500g Calibration weight from Amazon. Every time I use my small domestic digital scales, I calibrate them using these weights. I then weigh a few jars and tare my scales to the heaviest empty jar. As I fill each jar I weigh it on my scales and make sure it is a few grams over the declared weight.
How do I comply with the labelling regulations?
The labelling legislation can also be easily dealt with. By ordering honey labels from one of the online honey label printing services, like Thorne, all the requirements of what you must put on the label and the size of the print for the various bits of information is taken care of, by just filling in the boxes.
It’s common practice to put the end of the following year for the best before date, produce of UK for the origin, the name of the honey is normally where it is from and an address that enables the consumer to contact the beekeeper. The weight needs to be in grams and you can give it any lot code you find useful. I like to use the year of filling followed by a sequential label number.
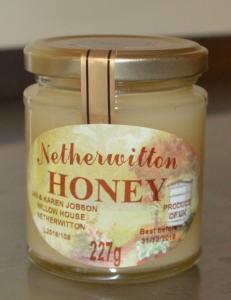
The Honey Regulations 2015 and the Food Labelling Regulation have a lot to say about the specific words that you can use to describe the honey. You are quite safe using the word “honey” but if you want to put anything like “heather”, “comb” or “local” you should study the wording of the Honey Regulations.
The aim is to prevent anything that is misleading. So, if you have the name of a place, the honey needs to be from that place. If you mention a forage, the honey needs to be mainly of that forage. Also take care with pictures. If you show a picture of a plant on the label, you are implying that is what is in the jar!
At about 10p per jar the pre-printed label and tamper evident strip give the jars a professional look and ensure compliance with the legislation.
What honey processing records do I keep?
Traceability is important for food. The small-scale beekeeper can keep the records simple, especially if they are processing honey less than 3 or 4 times a year.
My records follow the buckets. I record the dates I take honey from the hives in my apiary journal. When I extract the supers I create a “bucket” card for each bucket that gets filled. This stays with the bucket until it is emptied. On the card are the following pieces of information
- The date the honey was taken from the hive
- The date that it was extracted and put into the bucket
- The Weight of honey in the bucket (measured using suitcase weighting scales – see photo)
- The date, duration and temperature of any heat that was used
- The date the bucket was emptied into jars and the lot number range of the labels
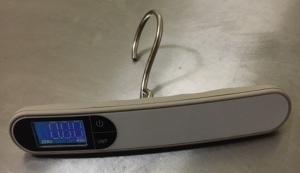
This may sound like a lot of detail, but if you ever have more than one bucket on the go it’s helpful to know which one was the spring one and which was the summer one! It can also very convincing if you ever need to show some due diligence over your honey processing.
Summary – jarring honey
When honey processing, filling jars with honey can be done in a simple and hygienic way, with a minimum of equipment, by the small-scale beekeeper, while still satisfying the regulations. You can achieve a lot, with equipment you would often find in a domestic kitchen and some decent labels, if you follow some good hygienic practices and make sure there is more than the declared weight of honey in the jar.
The presentation of your honey in nice clean jars, with professional labels and tamper evident strips will help reassure people, who buy your honey, that it has been hygienically processed and is safe to eat.
Click here to go to part three of the series on honey processing.
If you have found this interesting or helpful, please subscribe to my blog, or like/share on Facebook.


Hi Ian
These articles have been a great help. I’ve spent time wondering whether I was preparing my honey jars properly, and that everything I doing was right. Good photography and explanations. Many thanks. Glynis
Thanks for these Ian, useful tips. Any chance of some additional pictures of your tilting platform as I could do with making one. I can send you an e-mail if it is easier to send pictures directly rather than posting. Thanks
Useful info. Appreciate the time you’ve taken. Here in Australia a warm room is no problem. ?
Thanks for the feedback.
Hi Ian, Very useful indeed and pleased to see the hairnet and gloves being worn. A true professional taking their craft seriously. Please can you let me know where you got your valved container from? Thank you.
Hi Hannah
Thanks for the feedback.
Look out for offers on honey processing equipment at the shows.
I bought mine from Simon the beekeeper through Amazon.
Kind Regards